Portland guide · 10 min read
How to Prepare for Christmas Light Installation in Portland: A 4-6 Week Pre-Install Guide
Portland homeowners should begin Christmas light installation prep 4 to 6 weeks before install — typically September for a November display. Decisions to make in that window include LED vs incandescent, C9 vs C7 vs mini-LED, color scheme, GFCI outlet capacity, gutter clearance before install, and design scope. Day-of install runs 2 to 4 hours for a typical single-story home. Take-down is scheduled in mid-January.
By Monte Wallenstein Published
Preparing for Christmas light installation in Portland starts 4 to 6 weeks before your install date — which for most residential homeowners means September for a November display. The pre-install window is when the consequential decisions get made: LED vs incandescent, bulb type, color scheme, electrical setup, gutter clearance, and design scope. By the time the crew shows up on install day, every meaningful choice has already been made.
This guide walks through the full preparation sequence — pre-install checklist, day-of expectations, through-season service, and take-down scheduling — for both residential and commercial Portland properties.
The pre-install timeline: 4 to 6 weeks out
| Weeks before install | What to do |
|---|---|
| 6 weeks | Initial call; design consultation; bulb type and color scheme selection |
| 4–5 weeks | Confirm scope, get written quote, secure install date |
| 2–3 weeks | Schedule gutter cleaning if not already done; check outdoor electrical |
| 1 week | Confirm install date and crew arrival window; clear access paths |
| Install day | Be available for crew arrival, design walk-through, and final approval |
The biggest mistake Portland homeowners make is calling in mid-October hoping for an early November install. By that point, most reputable installers’ November calendars are full of commercial accounts and repeat residential clients booked in September. For a deep dive on the booking calendar, see when to book Portland Christmas light installation.
The pre-install checklist
1. Measure your roofline (or let the installer do it on the call)
A 10-minute walk-around with a tape measure gives you the linear footage number that drives the quote. For most Portland homes:
- Front roofline only: 30 to 60 linear feet for single-story; 50 to 100 for two-story
- Front + sides: 80 to 150 linear feet
- Full perimeter: 120 to 250 linear feet for typical metro homes
You do not actually need to measure if you book early enough — most reputable installers do this on the design walk-through. But if you are getting multiple quotes, having a rough footage number on hand keeps comparisons honest.
2. Decide bulb type: LED vs incandescent
This decision is mostly settled in 2026 — virtually every reputable Portland installer now uses commercial-grade LED strands. Incandescent is largely retired from professional work for power, lifespan, and safety reasons. The comparison:
| Attribute | Commercial LED | Incandescent |
|---|---|---|
| Power consumption | Very low (0.5–1.5W per bulb) | High (5–7W per bulb) |
| Bulb life | 25,000+ hours; 5–7 PNW seasons | 1,000–2,000 hours; 1–2 PNW seasons |
| Heat output | Cool to touch | Runs hot — minor fire risk on dry foliage |
| Color saturation | Crisp; modern look | Warmer, slightly more nostalgic |
| Up-front cost | Higher per strand | Lower per strand |
| Lifetime cost | Lower (longer life, lower power) | Higher (frequent replacement, higher power) |
| Safety on landscape | Cool — safe near branches | Hot — keep clear of dry foliage |
| Storm tolerance | Sealed casings handle PNW weather | More vulnerable to wet weather |
For a Portland install, LED is the standard recommendation. The only homeowners who still occasionally request incandescent are those committed to a specific nostalgic look on a small accent run.
3. Decide bulb shape: C9, C7, or mini-LED
Each shape suits different parts of a Portland home. Most full installs combine all three.
| Bulb shape | Size | Best for | Visual character |
|---|---|---|---|
| C9 | 2.5-inch teardrop | Roofline on two-story; long runs; classic American look | Bold, traditional, visible from the street |
| C7 | 1.5-inch teardrop | Single-story roofline; accent runs; window outlines | Mid-scale, classic look at smaller size |
| Mini-LED | 0.25-inch on thin wire | Tree wrapping; shrubs; columns; railings | Subtle, twinkly, fills volume rather than outlines |
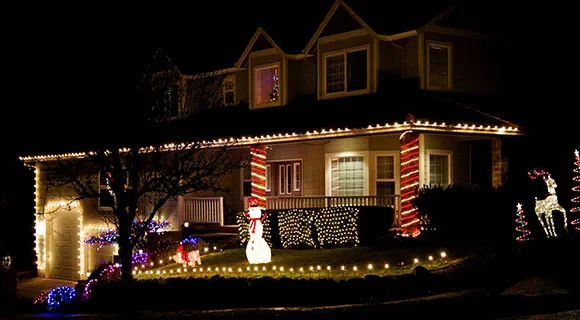
A typical Portland two-story install in a neighborhood like Eastmoreland or Laurelhurst combines C9 along the front and side rooflines, mini-LED wrapped on the landscape trees, and sometimes C7 on accent runs around the entry. Single-story bungalows in Sellwood or Alberta often look better with C7 on the roofline and mini-LED on shrubs, since C9 can overpower a smaller roofline.
4. Pick a color scheme
The four most common Portland choices:
- Warm white (classic). The most popular choice for traditional homes; reads as the historic American Christmas look. Pairs well with C9 along the roofline.
- Cool white (modern). Crisper, more architectural. Pairs well with contemporary homes and clean rooflines. Reads almost like daylight rather than candlelight.
- Multicolor classic (red, green, blue, gold). The nostalgic family-home look. Works on rooflines and landscape both.
- Custom palettes. Red-and-white candy cane, blue-and-white winter, gold-and-warm-white elegant, branded corporate colors. Most installers can custom-build any palette with 4 to 6 weeks notice.
For HOA-controlled neighborhoods in places like Bethany, parts of Lake Oswego, and Happy Valley, check the HOA design rules before finalizing color. Some boards require warm white only.
5. Check outdoor power outlet capacity and GFCI status
This is the prep item homeowners most often miss. Every Portland install needs:
- A GFCI-protected outdoor outlet within 50 feet of the display
- A circuit not shared with major appliances (no running the display off the same outlet as an outdoor heat pump or hot tub)
- Weather-sealed in-use covers on outdoor outlets exposed to rain
Most commercial LED displays draw 1 to 4 amps total — a fraction of a 15-amp circuit. The constraint is electrical safety, not amperage capacity. Older Portland homes — particularly pre-1980 in the Sellwood, Alberta, and St. Johns areas — often have only one outdoor outlet, and sometimes it is not GFCI. The installer can usually work around this with a weather-sealed extension run, but flag it on the booking call so the crew arrives prepared.
6. Clear gutters before install
A clean gutter system matters for the install in two ways:
- Gutter clips need clean troughs. If the install uses gutter clips for any portion of the run, packed Douglas fir needles prevent the clips from seating cleanly.
- Working surface matters. Crews working from ladders along the eave benefit from a clean drip edge — debris in the gutter creates wet, slippery conditions that slow the install.
The right sequence is gutter cleaning 1 to 3 weeks before the light install. Some Portland contractors (we are one) handle both services in-house and coordinate the visits. Others require you to arrange the gutter clean separately. Confirm at booking.
7. Choose scope: roof-only vs tree-mounted vs full-yard
The scope decision controls the budget more than any other choice. Three common scopes:
- Roof-only. C9 or C7 along the front roofline or full perimeter. Simplest install; lowest cost; lowest install time. Typical 2-4 hours for a single-story Portland home.
- Roof + landscape trees. Adds mini-LED wrapping on 2-6 landscape trees. Tree wrapping is labor-intensive; each tree adds 20-45 minutes depending on size. Often the highest visual impact per dollar.
- Full-yard. Roof, trees, shrubs, columns, entry archways, sometimes inflatables or projected elements. The estate-property scope; common in West Linn, Lake Oswego, and the West Hills. Can take a full day to multiple days of install time.
For Portland market reference, full-service Christmas light installs typically run from a few hundred dollars for a small single-story roof-only install up to several thousand for full estate-property scopes. These are general market ranges, not specific quotes — every home gets a written quote in writing before any work starts.
8. Arrange crew access
A few specifics that smooth the install day:
- Driveway clear for the install truck and ladders
- Side gate unlocked if the install reaches the backyard or side yard
- Dogs contained during the install window
- Outdoor lights off during install for crew visibility
- Sprinklers off so the install does not happen on wet landscape
Day-of install: what to expect
A typical Portland install day runs in three phases.
Morning: weather check and setup
Most Portland installers prefer morning installs in October — dew burns off, daylight is longest, and afternoon rain is less likely. The crew typically arrives within a 1-2 hour window (most installers give “morning” or “afternoon” rather than a specific time, because each install runs longer or shorter than estimated). Crew arrives with truck, ladders, lights, clips, controllers, and timer hardware.
Mid-install: design walk-through
Within the first 15 to 30 minutes, the lead installer walks the design with the homeowner. This is the last chance to adjust — adding a tree, removing a section, changing color emphasis. After the walk-through, the crew works mostly independently.
Install duration
Approximate timing for typical Portland scopes:
| Home type and scope | Typical install time |
|---|---|
| Single-story roofline only | 2 to 4 hours |
| Single-story roof + 2-3 landscape trees | 3 to 5 hours |
| Two-story full perimeter roofline | 4 to 6 hours |
| Two-story roof + trees + landscape accents | 5 to 8 hours |
| Estate property full-yard | Full day or split across 2 days |
Final walk-through and lighting test
Before the crew leaves, the lead installer turns on the full display with the homeowner, confirms timer settings, and documents the install with photos. This is when any “the warm white is too yellow” or “the C9 spacing looks off” feedback gets addressed. Once the crew leaves, changes become a scheduled return visit rather than an in-the-moment fix.
Photo documentation
A reputable Portland installer photographs the completed install for the homeowner’s records and for the installer’s storage labeling. The photos make the following year’s install faster — the installer knows exactly what went where.
Through-season service: what’s covered after install
A full-service Portland Christmas light install includes in-season service. The standard scope:
- Bulb-replacement guarantee. Any failed bulb or strand replaced at no charge through New Year’s Day. Most failures happen in December after a wind event; the installer dispatches a small repair crew within 24-48 hours.
- Storm-response repair. Atmospheric river storms or freezing rain occasionally tear down sections. The installer re-installs without additional charge.
- Timer setup and adjustment. Standard timers run dusk-to-midnight or dusk-to-2am. Smart-controller setups (app-controlled, color-changing) need their own setup at install and occasional adjustment.
- Dimmer recommendations. Most homeowners want full brightness on the roofline and dimmed brightness on landscape trees. The installer can wire dimmers into specific zones for ambient control.
- Mid-season add-ons. Decided you want one more tree wrapped on December 10? Most installers can squeeze in small adds during the maintenance rounds.
Through-season coverage typically ends January 1 — after that, the calendar shifts to take-down scheduling.
Take-down and storage
When to schedule take-down
Schedule take-down for the first three weeks of January. Most reputable Portland installers complete take-downs by January 25 to clear the calendar for off-season work like permanent architectural lighting, gutter cleaning, and event installs.
Leaving lights up past mid-February exposes them to additional UV degradation, freeze-thaw cycles, and storm damage that shortens their working life by a season or more.
Storage: the under-discussed value
This is the part of professional Christmas light installation that most homeowners do not realize is even an option. When the crew takes lights down, they are labeled to your home (front roofline, garage roofline, front landscape tree 1, etc.) and stored at the installer’s warehouse.
The advantages over DIY storage:
- Climate-controlled. Garage temperature swings, attic heat, and basement humidity all shorten LED life. Climate-controlled storage adds years.
- Labeled and inventoried. Your specific lights, ready for next October’s re-install. No “which box did I put the C9 strands in?” panic in September.
- Insurance covers them. Most installer storage policies cover loss and damage.
- Year-over-year continuity. The same lights install faster each year because the configuration is already known.
Storage is typically priced as a paid add-on — often a flat seasonal fee. Confirm at booking; this is one of the easier-to-overlook line items.
Commercial-specific notes
Commercial Christmas light installs in Portland operate on a different calendar and design discipline than residential.
HOA-controlled neighborhoods
HOAs in places like Bethany, Lake Oswego sub-developments, and parts of Happy Valley sometimes require:
- Pre-approved design packages. The HOA board approves the install design before work starts.
- Uniform color schemes. Warm white only, or specific approved palettes.
- Coordinated install timing. Multiple homes installed in a coordinated sequence rather than independently.
- Removal deadlines. Most HOAs require lights down by January 31 or earlier.
HOA boards typically reach out to installers in July for the upcoming season — earlier than individual residential booking.
Multi-storefront and retail timing
Black Friday is the hard deadline for most retail clients. Multi-tenant office parks and storefronts:
- Book in August for an October install
- Often install pre-business-hours to avoid disrupting customer traffic
- Use branded color schemes (corporate red, gold accent, etc.)
- Coordinate lift-equipment scheduling weeks ahead
Apartment and condo buildings
Property managers coordinate access, lift equipment, and tenant notification. Common areas, lobbies, exterior architectural lighting, and parking-lot tree wrapping. Permits may apply for street-side installs.
How this fits the year-round operating model
The reason a reputable Portland Christmas light installer can offer mid-season repair within 24-48 hours, off-season permanent lighting installs, and January late take-downs is that the same crew is doing gutter cleaning, roof cleaning, pressure washing, and window cleaning the other ten months of the year. Seasonal-only installers — there are several in the Portland market — shut down in January and cannot help in February.
For the full seasonal context on when Christmas light booking fits into the Portland exterior maintenance year, see our Pacific Northwest seasonal home maintenance calendar.
Quick Recap
- Start prep 4 to 6 weeks before install — September for most residential Portland homes.
- Decide bulb type (commercial LED is now the standard), bulb shape (C9 for two-story roofline, C7 for single-story, mini-LED for trees), and color scheme.
- Clear gutters 1 to 3 weeks before install so clips seat cleanly and crews work safely.
- Confirm GFCI outdoor outlet availability; older Portland homes may need a workaround.
- Day-of install runs 2 to 4 hours for a single-story roofline, longer for full scope.
- Schedule take-down for the first three weeks of January; ask about labeled off-season storage as an add-on.
Frequently asked questions
- How far in advance should I book Christmas light installation in Portland?
- Book Christmas light installation in Portland 4 to 6 weeks before your target install date, which means September for most residential homeowners. Commercial accounts book earlier, usually August. Booking earlier than the 4-week window gives you full bulb-type and color-scheme selection, design consultation time, and the install date you actually want. Booking inside 4 weeks of install often means accepting whatever date is left, particularly in late October.
- Should I clear my gutters before Christmas light installation in Portland?
- Yes — clear gutters before Christmas light installation in Portland, particularly if any gutter clips will be used on the system. Compacted Douglas fir needles and leaves prevent clips from seating properly and make the install slower. Most reputable Portland installers coordinate a gutter cleaning visit before the install — either as part of one company's combined service or by scheduling around an existing gutter contractor's visit. Plan the gutter clean 1 to 3 weeks before the light install.
- What's the difference between LED and incandescent Christmas lights for a Portland install?
- LED Christmas lights use roughly 80 to 90 percent less power than incandescent equivalents, run cool to the touch, and last 5 to 7 seasons on commercial-grade strands. Incandescent bulbs produce a warmer, slightly more saturated light but consume far more power, run hot enough to be a minor fire risk on dry foliage, and last 1 to 2 seasons in PNW weather. Virtually every reputable Portland installer now uses LED commercial strands; incandescent is largely retired from professional work.
- Do I need a special outdoor outlet for Christmas lights in Portland?
- Most Portland Christmas light installs require a GFCI-protected outdoor outlet within 50 feet of the display, on a circuit not shared with major appliances. A typical commercial LED display draws 1 to 4 amps total — well within a standard 15-amp circuit — but the GFCI requirement is for outdoor electrical safety in wet weather, not for amperage. Older Portland homes without exterior GFCI sometimes need a temporary cord run from an interior GFCI outlet through a weather-sealed gap.
- How long does a Christmas light install take on a Portland home?
- A typical single-story Portland Christmas light install runs 2 to 4 hours on a residential home with roofline lights and basic landscape accents. A two-story home with full roofline, multiple landscape trees, and column wrapping runs 4 to 7 hours. Large estate homes with extensive tree wrapping and lift-equipment access can run a full day or split across two days. The crew size and lift equipment used both affect the total time.
- When should I schedule Christmas light take-down in Portland?
- Schedule Christmas light take-down in Portland for the first three weeks of January. Most reputable installers complete take-downs by January 25 to clear the calendar for off-season work. Leaving lights up past mid-February exposes them to additional UV degradation, freeze-thaw cycles, and storm damage that shortens their working life. Take-down often includes labeled storage of your lights at the contractor's warehouse as an add-on for the following season.
- What if a bulb burns out or a strand fails mid-season?
- A reputable Portland Christmas light installer includes in-season replacement of failed bulbs and storm-damaged strands at no additional charge through New Year's Day. The whole point of professional commercial-grade installs is that the homeowner does not climb ladders in December to fix a dark strand. Call the installer; they typically dispatch within 24 to 48 hours. Coverage usually ends January 1, after which take-down scheduling takes over from in-season repairs.
Related guides
-
9 min read
When to Book Portland Christmas Light Installation
Portland 2026 guide to booking Christmas light installation: September booking, October install, November-Dece...
-
11 min read
Pacific Northwest Seasonal Home Maintenance Calendar
A month-by-month Portland exterior home maintenance calendar covering gutters, moss, windows, pressure washing...
Ready to book?
Want gutters, moss, and windows on one annual schedule? Home Exterior Care Plan
Property manager, HOA, or commercial site? Property managers & HOAs Commercial cleaning
Need help with your Portland home exterior?
Same-day quotes by phone. No high-pressure sales. Bonded & insured · Family-owned since 2009
Happy with our work? Leave a Google review · Find us on Google Maps